Monthly Archives: January 2017

Beyond the supported – Cross forest style Exchange Online Migration

Migration and consolidation projects always put our skills to the test and in some cases forces us to do things that are not fully supported. But sometimes, the end justifies the means.

Some time ago, I did an Exchange Online onboarding project in a quite complex scenario, at least in terms of the identities. 10+ Active Directories and almost as many Exchange environments. On top of that, due to several reasons, it was not possible to create trusts between the different directories. Not the easiest starting point…
Looking at all different options we agreed upon to synchronize one of the directories to Azure AD. This meant that all users not in that directory were to get new accounts, effectively taking the first step towards a common environment.

– Identites – check!

The next step were to determine the migration strategy for the Exchange environments that was ranging from Exchange 2007 -> 2013. Given the quite complex scenario without trusts between the environments, our minds were set to use a third-party tool to do all the migrations. I always like challenging the obvious path, so I wanted to see if it was possible to do native mailbox moves even though there was no possibility to use the regular Hybrid Configuration Wizard.

Guess what – following cross-forest migration principals and copying the relevant attributes between the environments worked great! Cutting $100k in third-party software licensing costs from the project budget is never a bad thing either 🙂

A little simplified, we ended up with a scenario / environment looking like below:

fakehybrid

Remember that this is a quite complex scenario where you have to do most preparations “manually”, so don’t try this unless you really need this kind of scenario. Also note that the same approach works in a staged migration scenario from Exchange 2003/2007.

Assumptions:

  • You have a way to match users between the different environments when moving the attributes.
  • The target directory/forest has been prepared with the Exchange server schema.
  • SMTP/Port 25 is open from the source Exchange environments for outgoing coexistence mailflow.
  • You are in control of your incoming mailflow as well as AutoDiscover, depending on how your environment/domains look like. 🙂
  • This method will be used to migrate mailboxes, not for long-term coexistence. If you have separate SMTP domains per environment, free/busy sharing can be configured if needed.

Preparation steps: 
Source Exchange Environment:

1. Add the tenant routing domain (tenant.mail.onmicrosoft.com) as an accepted domain. Also create a send connector to solve outgoing email in the transition
2. Add the routing email address (smtp:samaccountname@tenant.mail.onmicrosoft.com) to all users in scope for migration.
3. Export the attributes needed to perform the migration from the source Exchange environment. The following attributes are needed for a successful migration. I have used Export-Clixml instead of a CSV-file for simpler handling importing back the Guid Attributes.

  • mail
  • mailNickname
  • proxyAddresses
  • msExchMailboxGuid       
  • msExchArchiveGuid  
  • legacyExchangeDN          
  • msExchRecipientDisplayType
  • msExchRecipientTypeDetails

4. Export mailbox permissions/calendar permissions for users/shared mailboxes if needed.
5. Enable MRSProxy in the Exchange Environment. Also create a service account with at least Recipient Management permissions to use setting up the migration endpoint in Exchange Online.

Target Active Directory / Exchange Online environment:
1. Set up an “Exchange Remote” migration endpoint towards the MRSProxy earlier created.
2. Import the attributes earlier exported in the user directory.
3. After a successful directory synchronization, verify that the users in scope shows up as Mail Users in Exchange Online. If you did the Exchange schema update after you installed AADConnect, don’t forget to refresh the schema there as well, otherwise you won’t synchronize the imported attributes.
4. Perform a test move and verify that everything works as expected. Just as in the case of a “normal” move, the mailbox will be converted to a remote mailbox after the move has been completed.

Migration/post migration steps 
1. Plan and execute your migration batches. Remember that this is not a regular hybrid environment with free/busy etc., so plan your batches accordingly.
2. Import eventual mailbox/calendar permissions after each batch.
3. Switch MX/Autodiscover to Office 365
4. Decommission the source Exchange environment.

Summary
One approach does not fit all and sometimes you have to think a little bit out of the box. I hope this post was interesting and that it might give you some creative ideas running in to similar scenarios. For any questions or feedback, feel free to comment here or ping me on Twitter, @daltondhcp.

/Johan

Create simple PowerBI reports for Intune through the Microsoft Graph

Reporting, playing with data and creating all kinds of charts is always fun. PowerBI is probably the simplest playground doing it.

While doing an O365 / EMS project, management wanted a simple dashboard to keep track of different KPI’s in the project. Example on the data they wanted was number of onboarded users to Exchange Online and enrolled devices in Intune. The Office 365 adoption content pack is in preview and provides lots of insights to how the services are used (in some cases, maybe too much)… In this specific case, we also had an Intune Cloud Only environment, so our reporting as well as delegation possibilites were very limited.

2017-01-03_13-34-12

Luckily enough, some Intune data (and its growing and growing) are nowdays exposed through the Microsoft Graph for us to consume with PowerBI directly with REST and OData.

In my example, I will simply get all registered devices to create my report. To find what possibilites there are, look in to the Microsoft Graph Documentation. If you want to use query parameters, you’ll find the supported ones here.

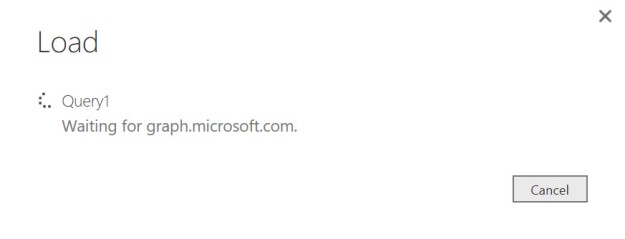
1. First connect and load the OData feed from Microsoft Graph. In my case I am using the https://graph.microsoft.com/v1.0/devices endpoint. Sign in with an organizational account or app that have appropriate permissions.
2017-01-03_14-36-01

2017-01-03_14-45-102017-01-03_14-45-30
2017-01-03_14-50-39 2017-01-03_14-50-55

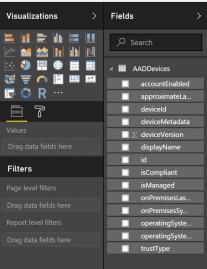
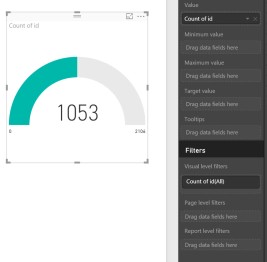
2. After the data has been loaded successfully in to PowerBI it’s time to create som nice charts!
2017-01-03_14-54-28
2017-01-03_14-56-41
2017-01-03_14-57-46


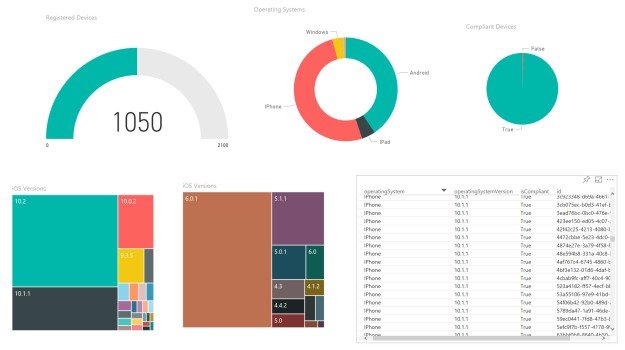
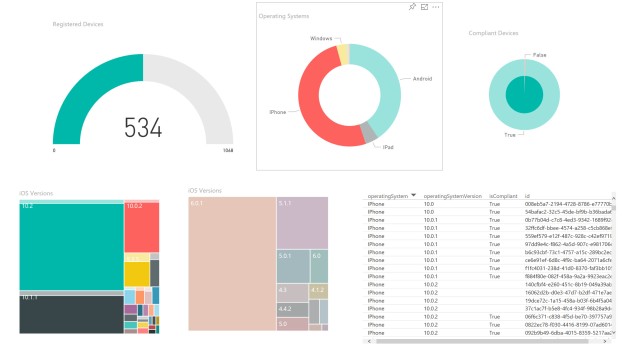
Result – My “finished” basic report

2017-01-03_15-06-09
2017-01-03_15-06-30

This was a simple example how to get started with PowerBI and the Microsoft Graph – hopefully you’ve now got some inspiration on what possibilites there are with just five minutes effort. Imagine what you could do if you really put in some time. 🙂

Happy reporting!

/Johan

ADFS Customization – add custom help form to the login page

In the spirit of sharing more “not-so-evergreen” ADFS customizations, I wanted to share another customization request I got a while ago.
The case was very simple, they customer wanted to fit more end-user information in the login flow than the ADFS login page could fit without sending the user to another page.
Onload.js to the rescue again! This time we are using it to simply create an additional form where we present additional information when clicking on the help button.

My example looks like this:
2017-01-01_21-06-44
2017-01-01_21-36-25
2017-01-01_21-36-43

Note that everything is in the JavaScript code, including the help page text. If preferred, that part could be loaded from another location.

Customize ADFS with help page (yes, I should move my content to GitHub)

// Author: Johan Dahlbom
// Blog: 365lab.net
// Twitter: @daltondhcp
// Get DOM elements and save as objects
var loginMessage = document.getElementById('loginMessage'),
    loginArea = document.getElementById('loginArea'),
    loginForm = document.getElementById('loginForm'),
	userNameInput = document.getElementById('userNameInput'),
    helpContent,
    usernameLink,
    passwordResetLink,
	errorText = document.getElementById("errorText"),
	introArea = document.getElementById("introduction"),
	authArea = document.getElementById("authArea");

var showingHelper = false,
    showingLoginform = false;

// CREATE CONTENT FUNCTIONS

function createHelpersForLoginForm() {
  //Create the hyperlink to the help form
  passwordResetLink = document.createElement('a');
  var linkText = "Need help?";
  passwordResetLink.appendChild(document.createTextNode(linkText));
  passwordResetLink.title = linkText;
  passwordResetLink.href = "#";
  passwordResetLink.onclick = toggleHelpContent;

  loginArea.appendChild(passwordResetLink);
}

function createHelpContent() {
  if (!authArea) {
    return;
  }
  helpContent = document.createElement("div");
  helpContent.style.display = 'none';

  helpContent.innerHTML = '\
    <br><br>\
    <h2><strong>What is my username?</strong></h2>\
    <p>Your username is the same as your email address. Example: ann.andersson@365lab.net</p><br>\
    <h2><strong>What is my password?</strong></h2>\
    <p>This is a secret chosen by you. It would not be a secret if we told you. If you forgot your password, you can reset it <a href="https://passwordreset.microsoftonline.com/?whr=365lab.net" target="_blank">here</a><br><br>\
    </p>\
    <h2><strong>Support</strong></h2>\
    <p>If you have any issues or questions, please contact our helpdesk at 555-GET-HELP or <a href="mailto:support@365lab.net">support@365lab.net</a><br><br><br></p>\
    ';

  // Link for close help
  var closeHelpContentLink = document.createElement('span');
  closeHelpContentLink.innerHTML = "Back to the login form";
  closeHelpContentLink.className = "submit";
  closeHelpContentLink.onclick = toggleHelpContent;

  // Duplicate it to have one before the content as well.
  // Uncomment these lines if the help  content grows.
  // var closeHelpContentLinkUpper = closeHelpContentLink.cloneNode(true);
  // closeHelpContentLinkUpper.onclick = toggleHelpContent;
  // helpContent.insertBefore(closeHelpContentLinkUpper, helpContent.firstChild);

  helpContent.appendChild(closeHelpContentLink);

  authArea.appendChild(helpContent);
}

function updateUI() {
  // Check for DOM errors
  if (!loginForm || !helpContent) {
    return;
  }

  if (showingHelper) {
    openHelpContent();
  } else {
    closeHelpContent();
  }
}

function toggleHelpContent() {
  showingHelper = !showingHelper;

  updateUI();
}

function openHelpContent() {
	helpContent.style.display="block";
	loginArea.style.display="none"
}

function closeHelpContent() {
	helpContent.style.display="none";
	loginArea.style.display="block"
}

// Create DOM elements 
createHelpersForLoginForm();
createHelpContent();
updateUI();

As usual, you update onload.js with the Set-AdfsWebTheme cmdlet.
Hope this will be useful for some of you guys! If you have questions, ping me o twitter or email!

Thanks,
/Johan