Monthly Archives: April 2015

Get in control of your Office 365 usage with PowerShell reporting!

Having deployed different Office 365 workloads often makes you want to get some statistics on how the services are used.
You can find quite a few reports for most of the services in the reporting part of the admin UI. 2015-04-18_20-57-28
The most common ones used are the inactive users and mailboxes reports, but there are also reports on how users are utilizing Lync Online, OneDrive for Business etc.

What not so many people know about is that all these reports and some more are available through Exchange Online PowerShell as well.
2015-04-18_21-25-05
As seen above, we have 61 cmdlets related to reporting in EXO PowerShell, some of them quite interesting. For example, Get-LicenseVsUsageSummaryReport, that will give you a brief overview of how many active users you have compared to the amount of assigned licenses. Detailed information about the cmdlets can be found here.

2015-04-26_16-21-31
Active users per workload in comparison to the amount of licenses assigned to the tenant.

Except the report above, two reports that many of my customers schedule and send out as an email to to admins, are Get-StaleMailboxReport and Get-StaleMailboxDetailReport. Those reports can in many cases help us avoid having to use Get-MailboxStatistics that has been the only option earlier.

Happy reporting!

/Johan

Advertisement

Unable to Connect to Skype for Business using old BPOS account

Recently I had to make a change in the Skype for Business Online environment of a customer. When I was trying to connect with Remote PowerShell I got an error message saying that it was “Unable to query AutoDiscover URL”.

lyncdiscover_missing

It turned out that this customer was once using BPOS, and the domain used at that time was tenant.emea.microsoftonline.com. This domain is not supported to use with Skype for Business, since important DNS records are missing.

Luckily there are two solutions for this problem:

Solution 1

Connect using the -OverrideAdminDomain option, as described in KB2909536.

$cssession = New-CsOnlineSession `
        –Credentials $cred `
        –OverrideAdminDomain 'tenant.onmicrosoft.com'

This will force the cmdlet to look for DNS records at the tenant.onmicrosoft.com domain

Solution 2

This solution requires you to change the user name of the admin account to a supported domain (or create a new account). Renaming accounts can be tricky, but it is worth the job, since the emea.microsoftonline.com domain support is deprecated.

Result

By using a new admin account I was able to connect.

lyncdiscover_working

/ Andreas

Switch usage model in Azure Multi-Factor Authentication Server

Azure Multi-Factor Authentication is a really great service that helps you secure both cloud apps and on premise apps with easy means. Setting it up on premise requires you to create a multi-factor authentication provider in the Azure portal.

The first thing you need to choose creating a provider is the usage model (Per user/Per authentication) and as seen in the screenshot below, you cannot change the usage model after creating the provider.
2015-04-10_21-21-11

So what to do if having deployed the MFA server with a per user usage model and later the conditions are changing and the per auth usage model would be a better fit?
Since it is not possible to change the usage model of an existing provider as it is right now, you have to create a new one and reactivate your existing server with activation credentials from the new provider.

This is a pretty simple task to do still keeping all users and settings that have been done on the server, but unfortunately it comes with a pretty big caveat if you’ve enrolled a lot of users with the MFA Mobile App. That means your users will have to re-enroll the mobile app in the user portal after you have done the usage model change. As a workaround to avoid interruption doing the change, you can of course change the mobile app users to Text or Phone verification instead.

1. Identify users that have the mobile app activated and inform them about the change.
2015-04-11_12-24-12
2. Make a backup copy of the data folder in the Azure MFA installation path. (in most cases, C:\Program Files\Multi-Factor Authentication Server\Data)
3. Generate activation credentials for your new auth provider with the target usage model. (You have 10 minutes before you need to generate a new set of credentials)
2015-04-11_12-57-49
2015-04-11_12-58-33
2015-04-11_12-59-12
4. If you have the Azure MFA Server UI running, exit that and then rename the licenseKey file in the installation folder.
2015-04-11_12-56-00
5. Starting the MFA Server UI again, you will now get the first run wizard where you can activate the server again. Since you won’t make any configuration changes, you can check the “Skip the Authentication Configuration Wizard” and just activate the server instead.
2015-04-11_13-10-34
2015-04-11_13-13-49
6. The server has now been activated against your new provider and all settings have been preserved. Do however make sure to verify all services that depend on the MFA server after the change has been done.
Also remember that the Mobile App-enabled users will get the following error when authenticating until they have re-enrolled their account with the app or changed the verification model.
2015-04-11_13-46-43

As you’ve seen in the post, it is not very hard to switch the usage model, even though it can be a bit painful if you have a lot of users utilizing the mobile app. Let me know if you have questions!

/Johan

Get rid of your Office 365 Scheduled tasks with Azure Automation!

Implementing Office 365 in a production environment you most often end up with quite a few scheduled scripts for licensing, shared mailbox maintenance and other similiar tasks. When moving more and more services to the cloud, moving from infrastructure services to platform services is the way of nature.

One service that can help you to get more efficient when it comes to scheduling scripts is Azure Automation. Instead of having a server where you schedule your scripts, you simply schedule them within the automation service that takes care of the rest. As of now, Azure Automation does not support use of the Azure Active Directory Powershell module, which means we cannot use the service for our licensing scripts. Make sure to vote for the suggestion to fix that here.

Exchange Online, Lync Online and SharePoint Online do however work well, so that’s what my example is going to be about. To make it easy for me I’m using a script from one of my older posts about Dynamically adding mailbox permissions through groups, with some adjustments to fit Azure Automation.

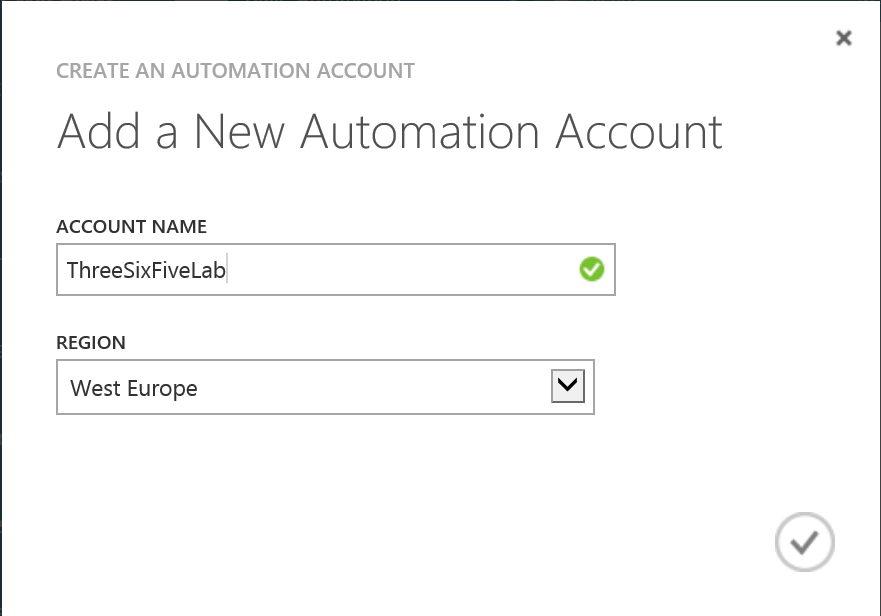
1. First of all, if you don’t already have one, you need an Azure Automation account. I’m choosing to create mine in the West Europe region. By default, it will use a free automation plan that gives you 500 minutes of job runtime per month.
2015-04-05_16-56-21
2. Now create an asset/setting that will store your Exchange Online admin credentials in a secure way. We will call the asset ‘EXOCreds’ so we easliy can pick them up later in the script.2015-04-05_17-03-15
2015-04-05_17-04-13
2015-04-05_17-05-11
3. Create a runbook in the automation account you created earlier, in my case I called it ‘Sync-EXOSharedMailboxPermissions’.
2015-04-05_17-15-35
4. Now it’s time to author the runbook, in my example I’ve just changed some minor things with parameters and credentials. If you’re a PowerShell WF Pro, there might be a lot of things you can do to improve the script.
2015-04-05_19-11-27
Below you’ll find the code I’ve used:

Sync-EXOSharedMailboxPermissions

workflow Sync-EXOSharedMailboxPermissions {
<#
    .SYNOPSIS
    The script will automatically assign mailbox and recipient permissions on shared mailboxes based on groups.
    Modified 2015-04-05 to support Azure automation and PowerShell workflows
    .NOTES
    File Name: SharedMailboxViaGroups.ps1
    Author   : Johan Dahlbom, johan[at]dahlbom.eu
    Blog     : 365lab.net
    The script are provided “AS IS” with no guarantees, no warranties, and they confer no rights.
    Requires PowerShell Version 3.0!
#>
    #Credentials to connect to Exchange Online
    $Credentials = Get-AutomationPSCredential -Name 'EXOCreds'
    #Prefix to search for
    $Prefix = 'SM-'
    function Connect-ExchangeOnline {
    param (
        $Creds
    )
        #Clean up existing PowerShell Sessions
        Get-PSSession | Remove-PSSession
        #Connect to Exchange Online
        $Session = New-PSSession –ConfigurationName Microsoft.Exchange -ConnectionUri https://outlook.office365.com/powershell-liveid/ -Credential $Creds -Authentication Basic -AllowRedirection
        $Commands = @("Add-MailboxPermission","Add-RecipientPermission","Remove-RecipientPermission","Remove-MailboxPermission","Get-MailboxPermission","Get-User","Get-DistributionGroupMember","Get-DistributionGroup","Get-Mailbox")
        Import-PSSession -Session $Session -Prefix "Cloud" -DisableNameChecking:$true -AllowClobber:$true -CommandName $Commands | Out-Null
    }
    Connect-ExchangeOnline -Creds $Credentials
    inlineScript {
        function Add-JDMailboxPermission {
            param(
                [string]$Identity,
                [string]$SharedMailboxName
            )
            try {
                Add-CloudMailboxPermission -Identity $SharedMailboxName -User $Identity -AccessRights FullAccess -ErrorAction stop | Out-Null
                Add-CloudRecipientPermission -Identity $SharedMailboxName -Trustee $Identity -AccessRights SendAs -Confirm:$False -ErrorAction stop | Out-Null
                Write-Output "INFO: Successfully added $Identity to $SharedMailboxName"
            } catch {
                Write-Warning "Cannot add $Identity to $SharedMailboxName`r`n$_"
            }
        }
        function Remove-JDMailboxPermission {
            param(
                [string]$Identity,
                [string]$SharedMailboxName
            )
            try {
                Remove-CloudMailboxPermission -Identity $SharedMailboxName -User $Identity -AccessRights FullAccess -Confirm:$False -ErrorAction stop -WarningAction ignore | Out-Null
                Remove-CloudRecipientPermission -Identity $SharedMailboxName -Trustee $Identity -AccessRights SendAs -Confirm:$False -ErrorAction stop -WarningAction ignore  | Out-Null
                Write-Output "INFO: Successfully removed $Identity from $SharedMailboxName"
            } catch {
                Write-Warning "Cannot remove $Identity from $SharedMailboxName`r`n$_"
            }
        }
        function Sync-EXOResourceGroup {
            [CmdletBinding(SupportsShouldProcess=$true)]
            param(
                [string]$Prefix = 'SM-'
            )
            #Get All groups to process mailboxes for
            $MasterGroups = Get-CloudDistributionGroup -ResultSize Unlimited -Identity "$Prefix*"
            foreach ($Group in $MasterGroups) {
                #Remove prefix to get the mailbox name
                $MbxName = $Group.Name.Replace("$Prefix",'')
                $SharedMailboxName =  (Get-CloudMailbox -Identity $MbxName -ErrorAction ignore -WarningAction ignore).WindowsLiveID
                if ($SharedMailboxName) {
                    Write-Verbose -Message "Processing group $($Group.Name) and mailbox $SharedMailboxName"
                    #Get all users with explicit permissions on the mailbox
                    $SharedMailboxDelegates = Get-CloudMailboxPermission -Identity $SharedMailboxName -ErrorAction Stop -ResultSize Unlimited | Where-Object {$_.IsInherited -eq $false -and $_.User -ne "NT AUTHORITY\SELF" -and $_.User -notmatch 'S-\d-\d-\d+-\d+-\d+-\d+-\w+' -and $_.User -notlike "$Prefix*"} |  Select-Object @{Name="User";Expression={(Get-CloudUser -identity $_.User).WindowsLiveID }}
                    #Get all group members
                    $SharedMailboxMembers = Get-CloudDistributionGroupMember -Identity $Group.Identity -ResultSize Unlimited
                    #Remove users if group is empty
                    if (-not($SharedMailboxMembers) -and $SharedMailboxDelegates) {
                        Write-Warning "The group $Group is empty, will remove explicit permissions from $SharedMailboxName"
                        foreach ($user in $SharedMailboxDelegates.User) {
                            Remove-JDMailboxPermission -Identity $user -SharedMailboxName $SharedMailboxName
                        }
                        #Add users if no permissions are present
                    } elseif (-not($SharedMailboxDelegates)) {
                        foreach ($user in $SharedMailboxMembers.WindowsLiveID) {
                            Add-JDMailboxPermission -Identity $user -SharedMailboxName $SharedMailboxName
                        }
                        #Process removals and adds
                    } else {
                        #Compare the group with the users that have actual access
                        $Users = Compare-Object -ReferenceObject $SharedMailboxDelegates.User -DifferenceObject $SharedMailboxMembers.WindowsLiveID 

                        #Add users that are members of the group but do not have access to the shared mailbox
                        foreach ($user in ($users | Where-Object {$_.SideIndicator -eq "=>"})) {
                            Add-JDMailboxPermission -Identity $user.InputObject -SharedMailboxName $SharedMailboxName
                        }
                        #Remove users that have access to the shared mailbox but are not members of the group
                        foreach ($user in ($users | Where-Object {$_.SideIndicator -eq "<="})) {
                            Remove-JDMailboxPermission -Identity $user.InputObject -SharedMailboxName $SharedMailboxName
                        }
                    }
                } else {
                    Write-Warning "Could not find the mailbox $MbxName"
                }
            }
        }
        #Start Processing groups and mailboxes
        Sync-EXOResourceGroup -Prefix $Using:Prefix -Verbose
    }
}

5. Test the runbook by clicking the test button. You will be asked to save the runbook before you test. Hopefully your output will be as nice looking as mine. 🙂
2015-04-05_20-12-47
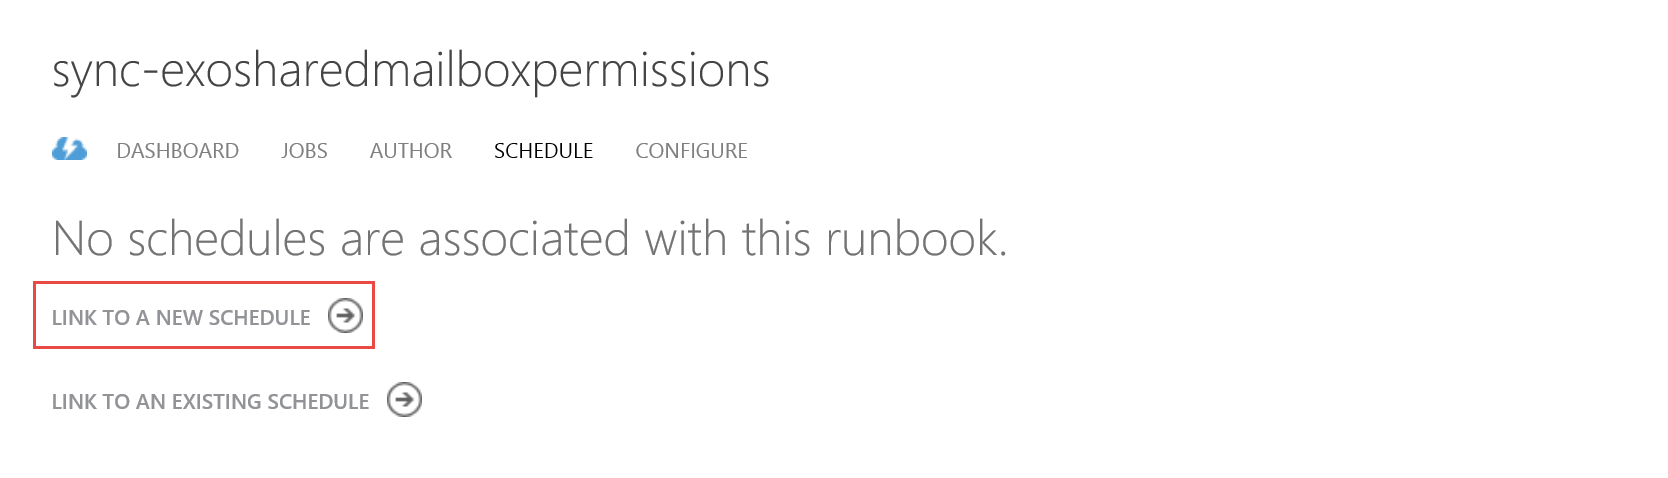
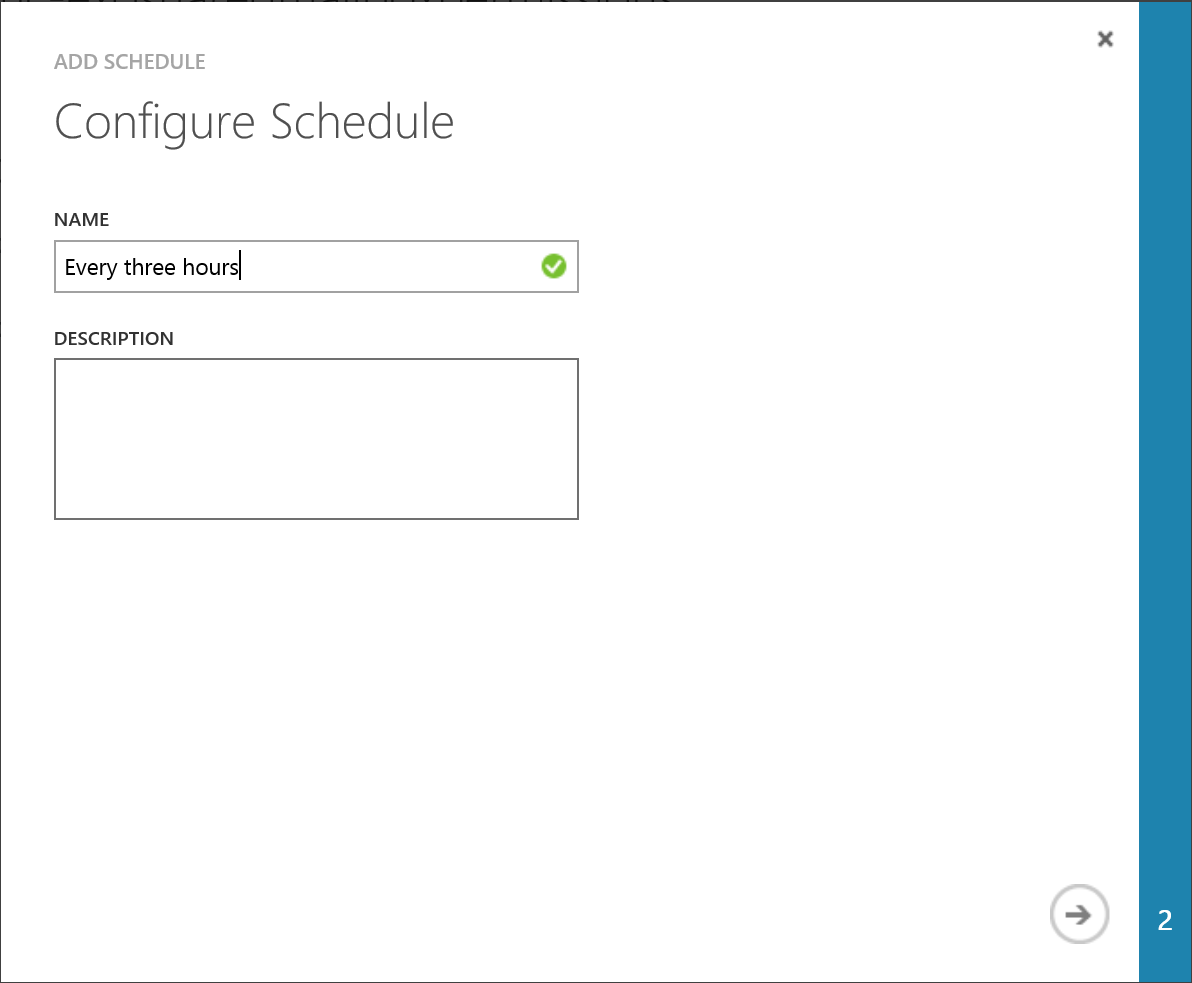
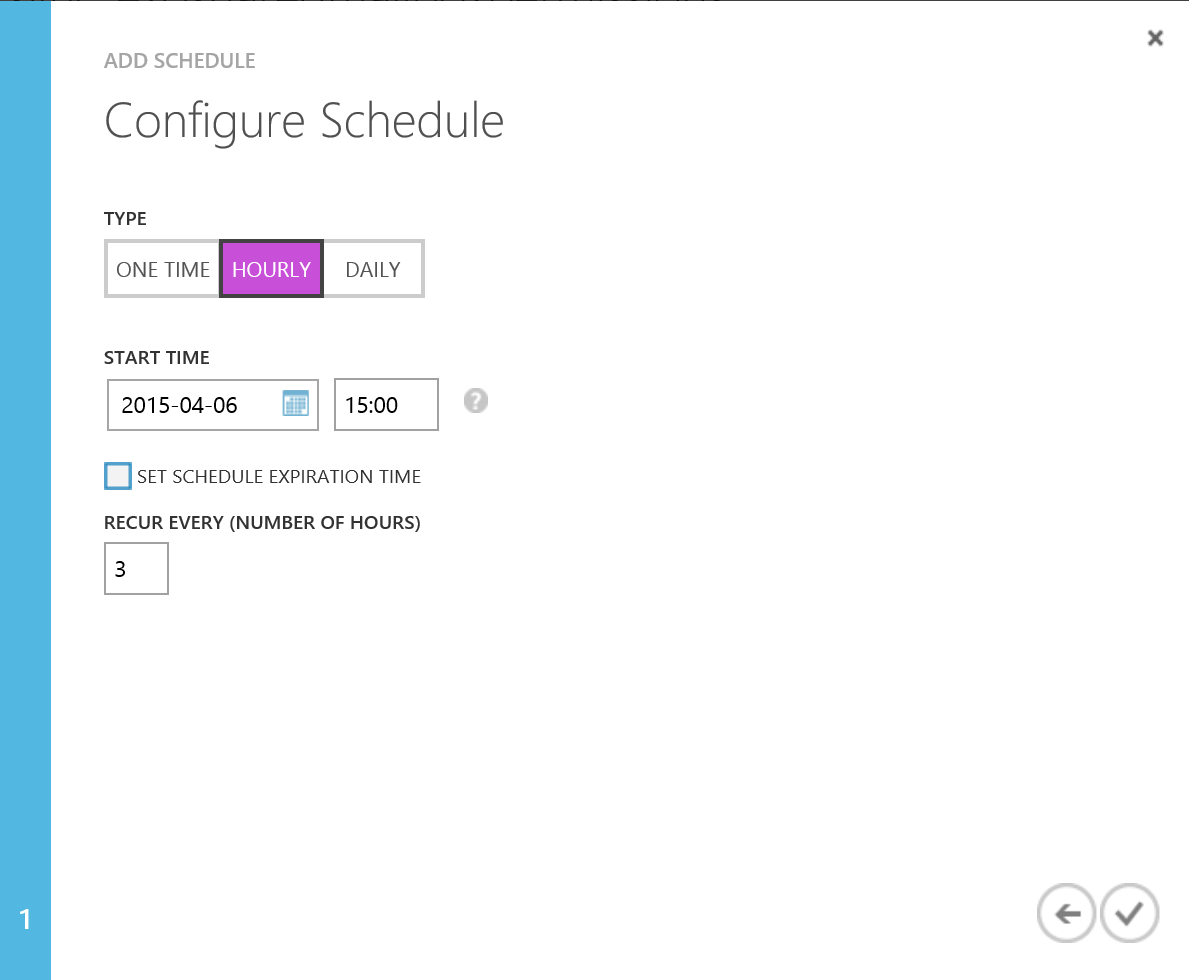
6. If all went good, you’re now ready to publish and schedule the runbook. I’m choosing to schedule mine to run every three hours. Depending on your script runtime, you might want to change this due to cost or other factors. (Remember your free 500 minutes!)
2015-04-05_20-12-472015-04-06_13-40-14
2015-04-06_13-45-53
2015-04-06_13-46-56
2015-04-06_13-47-44
2015-04-06_13-48-13
2015-04-06_13-48-39

My runbook is now published and scheduled, now it’s just to wait for the magic to happen. Hope this gives you an idea what Azure Automation can do for you!

Additional resources to get started can be found below:
Get Started with Azure Automation
Automating the Cloud with Azure Automation (MVA)

Until next time! 🙂

/Johan

Real world example on Network Security Groups in Azure

I have got many follow up questions regarding my post series on building your SSO infrastructure in Azure. One of the most common questions asked, have the one regarding how to configure the internal firewalls (Network Security Groups) between the perimeter subnet and the internal subnet in the Azure Vnet.

To make it as simple as possible, I am reusing the Vnet configuration from the first post in the ADFS series, as below.
2014-11-22 13-42-09
The example below assumes that your WAP servers is not joined to the domain. Please note that after you attach an NSG to a subnet, you will have to create specific rules for each endpoint that you have created (example RDP, WinRM etc.).

See the high level sketch below with the subnets including firewall rules.
365lab-Azure-NSG
To make the configuration as easy as possible, I’m using the NSG on a subnet level.

Note: As of today, you need to create and configure your Network Security Groups using Azure PowerShell. Prior doing any of the configuration below, you do need to connect to your Azure subscription with PowerShell.

1. Create a new NSG with the command below. They are created on a location basis, which in my case will be North Europe.

New-AzureNetworkSecurityGroup -Name "North Europe Perimeter" -Location "North Europe"

After the NSG has been created, a good way to check out the rule set in detail is by running the following command and redirecting the output to GridView.

(Get-AzureNetworkSecurityGroup -Name "North Europe Perimeter" -Detailed).Rules |
    Select-Object * | Out-GridView

2015-02-17_23-40-27

2. Attach the NSG to the subnet with the below command. Note that all inbound endpoints will stop working if you haven’t created a proper rule set at this point.

Set-AzureNetworkSecurityGroupToSubnet -Name "North Europe Perimeter" `
                                      -VirtualNetworkName "365lab-Azure" `
                                      -SubnetName "Azure-Perimeter"

3. Now it is time to configure the rule set. To make it a bit easier to get an overview of the rules, I am using a CSV file as input. Remember that the priority of the rules are very important. You can download an example of the csv file here.
2015-04-05_11-44-17

#Get the created NSG
$NSG = Get-AzureNetworkSecurityGroup -Name "North Europe Perimeter"
#Import the csv with the rules
$Rules = Import-Csv .\NSG-Ruleset.csv 

foreach ($Rule in $Rules) {
    try {
        Set-AzureNetworkSecurityRule -Name $Rule.Name `
                                     -Type $Rule.Type `
                                     -Priority $Rule.Priority `
                                     -Action $Rule.Action `
                                     -SourceAddressPrefix $Rule.SourceAddressPrefix `
                                     -SourcePortRange $Rule.SourcePortRange `
                                     -DestinationAddressPrefix $Rule.DestinationAddressPrefix `
                                     -DestinationPortRange $Rule.DestinationPortRange `
                                     -Protocol $Rule.Protocol `
                                     -NetworkSecurityGroup $NSG -ErrorAction Stop | Out-Null
        Write-Output "Created rule $($Rule.Name) successfully"
    } catch {
        Write-Warning "Error creating rule $($Rule.Name)`r`n$_"
    }
}

After a little while, you should have simliar output as below in your PowerShell console.
2015-04-05_12-15-05

You have now configured a DMZ/Perimeter network subnet in Azure to support your ADFS/WAP setup. The above method can of course be used creating all kinds of rules in NSG’s. Let me know if you have any questions!

/Johan

Awarded MVP in Office 365!

Yesterday was a very nervous day for me and the F5 button went warm pretty much the entire day. New quarter means new possibilities to get a Most Valueable Professional Award (MVP) from Microsoft. 16:26 did the email I was hoping for arrive – that I have got an MVP award for my contributions in the Office 365 community! Capture Thanks for all the support – I am looking forward continuing this journey and will do what I can to keep up with our contributions here and on other platforms together with my fellow MVP’s. /Johan