Tag Archives: autodiscover

Back to Basics: Creating new users in an Exchange Hybrid Deployment

Some of the most common questions I get from my clients are related to how to create new users in an Exchange Hybrid environment. I have seen users set up in an incorrect way in most Hybrid Environments. Some common problems resulting from this include missing Autodiscover functionality or bouncing emails from external users. The reason for these kind of problems is that your on-premises Exchange server doesn’t recognize the Exchange Online mailbox.

The best way of creating new users during the Hybrid is to use the New Remote Mailbox guide in Exchange Management Console (this can of course also be done in an on-premises Exchange 2013 server, the principle is the same). This will create both the AD account, and populate all necessary attributes for Office 365. It will also enable you to continue using Exchange Management Console for managing all Exchange attributes.

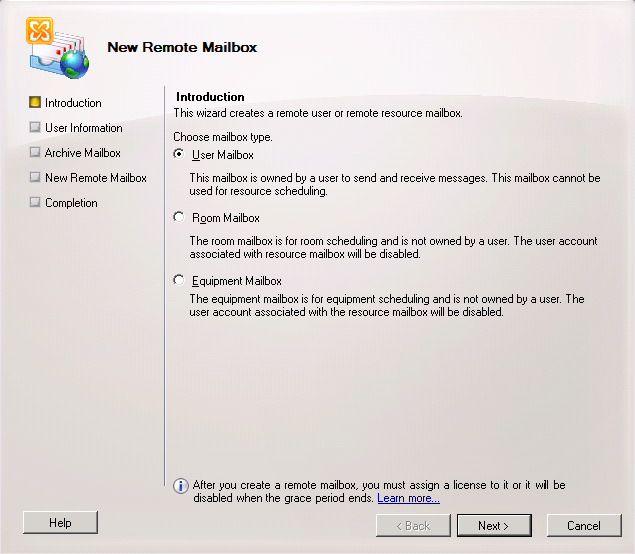
The key is to use the Mail Contact pane in Exchange Management Console. Start by right-clicking and select the New Remote Mailbox guide.

remotemailbox1

Select the type of mailbox you are creating, normally a User Mailbox.

remotemailbox2

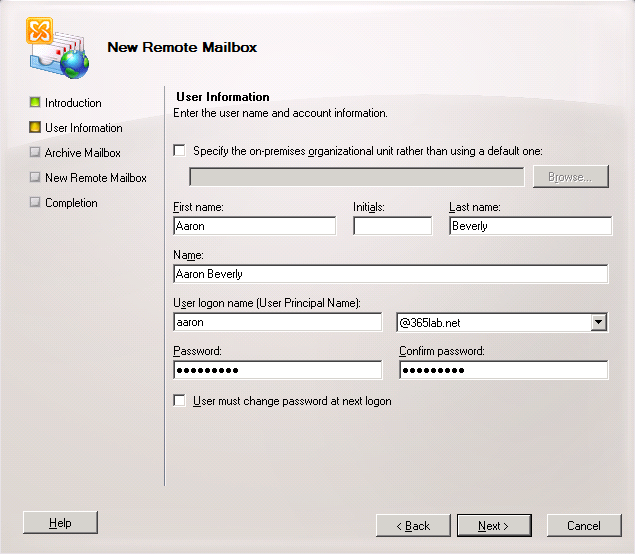
Fill in all the information that you would normally fill in when creating a new AD user.

remotemailbox3

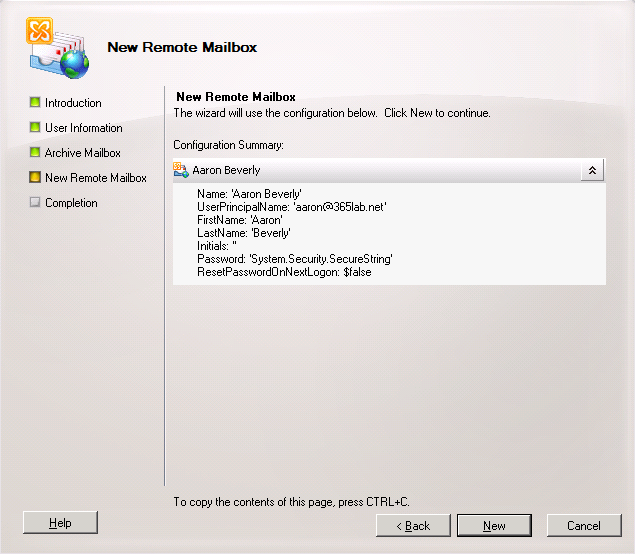
If you are not using Archive Mailboxes just click Next.

remotemailbox4

Review the summary and click New.

remotemailbox5

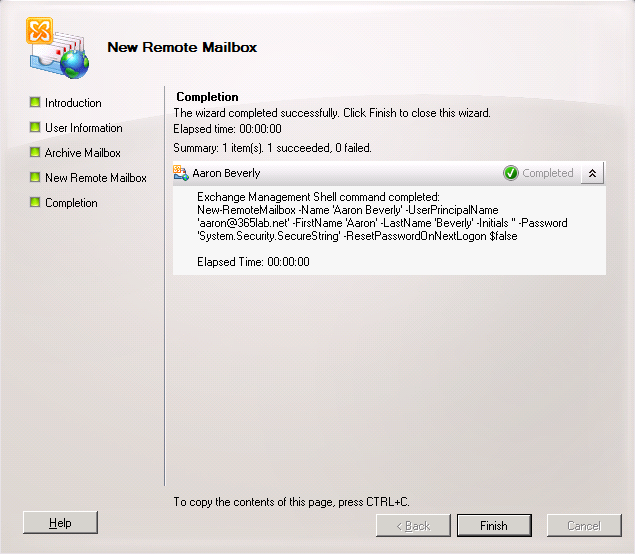
All done! Close the guide by clicking Finish.

remotemailbox6

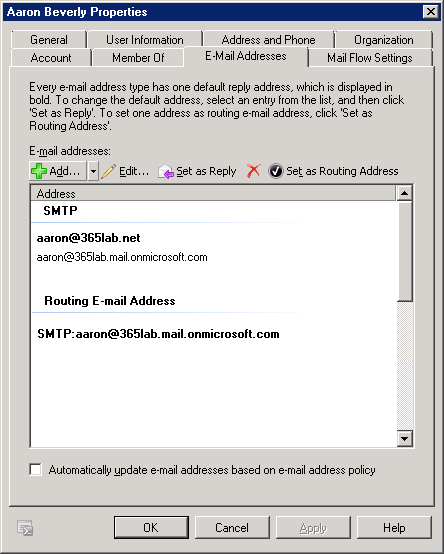
If we right-click on our new user and check the Email Addresses tab, we will see that it is already populated with all addresses according to our E-mail Address Policy. We even have a Routing E-mail Address set, pointing to our Office 365 tenant.

remotemailbox7

This means that we are all set, our on-premises Exchange server is now aware of the Mailbox in Office 365! The final step is to wait for DirSync (or force a sync) then assign a license to the user.

/ Andreas

Advertisement

How to manually configure an Outlook profile for Office 365

Manually configuring Outlook for Office 365 can be tricky. That’s what Autodiscover is for. But in some situations you have to be able to do a manual configuration in for example a pilot deployment. Here are the steps required.

The nice thing with this method is that we will be able configure Outlook without changing our Autodiscover DNS records. That means we can do a full Office 365 test deployment without affecting users in an on-premises Exchange environment.

The first step is to establish a remote PowerShell session to Exchange Online. Here we need the ExchangeGuid attribute from our mailbox. Copy this value and save it for later.

exguid

The next step is to launch the New Profile Wizard in Outlook. We will go for the option to do a Manual setup.

outlookprofile1

In the next screen we select that we have a Microsoft Exchange Server.

outlookprofile2

Now it’s time to enter the exchange server name. Here we need the ExchangeGuid from the first step. Write the Guid followed by @ and the email domain. The user name is our Office 365 user name.
Now click More Settings.

outlookprofile3

On the Security tab we select Anonymous Authentication.

outlookprofile4

On the Connection tab check the box to connect using HTTP and click Exchange Proxy Settings

outlookprofile5

Fill in all values as below

outlookprofile6

Click OK to close all windows. You will be asked for credentials, fill in your Office 365 username and password.

outlookprofile7

Now our Outlook Profile is ready to use and Outlook is configured for Exchange Online, without using Autodiscover.

/ Andreas