Manually configuring Outlook for Office 365 can be tricky. That’s what Autodiscover is for. But in some situations you have to be able to do a manual configuration in for example a pilot deployment. Here are the steps required.
The nice thing with this method is that we will be able configure Outlook without changing our Autodiscover DNS records. That means we can do a full Office 365 test deployment without affecting users in an on-premises Exchange environment.
The first step is to establish a remote PowerShell session to Exchange Online. Here we need the ExchangeGuid attribute from our mailbox. Copy this value and save it for later.

The next step is to launch the New Profile Wizard in Outlook. We will go for the option to do a Manual setup.
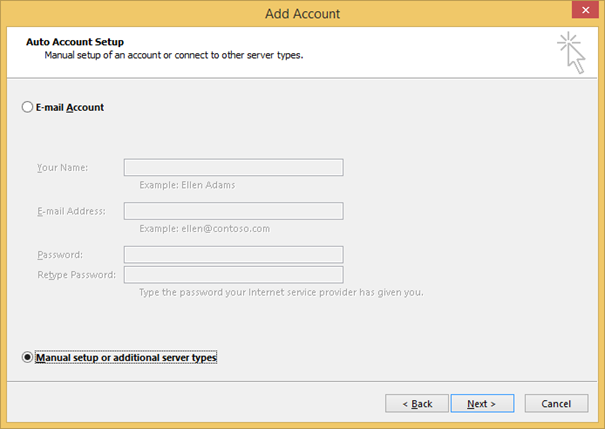
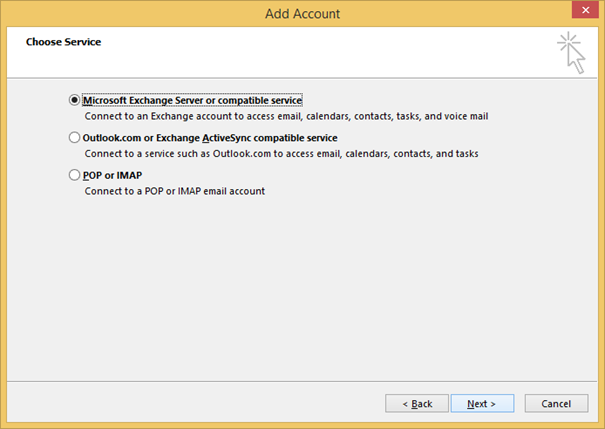
In the next screen we select that we have a Microsoft Exchange Server.
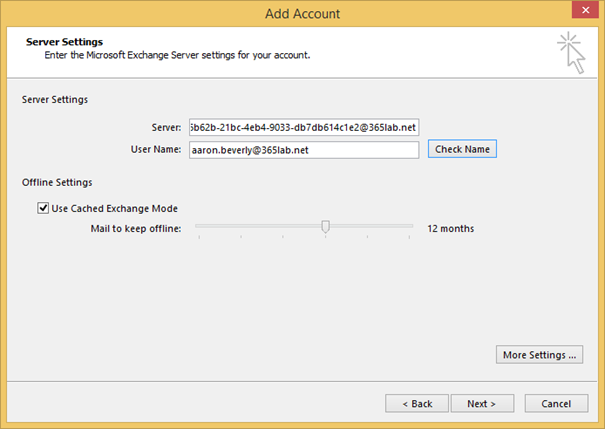
Now it’s time to enter the exchange server name. Here we need the ExchangeGuid from the first step. Write the Guid followed by @ and the email domain. The user name is our Office 365 user name.
Now click More Settings.
On the Security tab we select Anonymous Authentication.

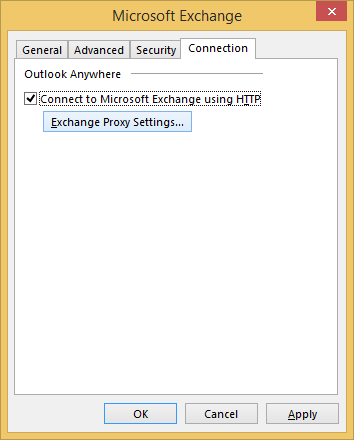
On the Connection tab check the box to connect using HTTP and click Exchange Proxy Settings
Fill in all values as below

Click OK to close all windows. You will be asked for credentials, fill in your Office 365 username and password.

Now our Outlook Profile is ready to use and Outlook is configured for Exchange Online, without using Autodiscover.
/ Andreas

instructions on getting connected to get the ExchangeGuid are needed to make this complete.
I have added a link to a TechNet article that describes how to establish the connection.
Hi, I’m concern on the disabling of Encryption for security reason, is there any way we can enable those?
All authentication is done using SSL encryption, so there is no reason to worry about unencrypted traffic over Internet.