When decomissioning your on-premises Exchange server after moving to Office 365 you need a new solution for SMTP relay to use with for example multi-functional printers. In some cases your internet provider can offer this service, but if you want control over your mail flow I recommend using Office 365 also for outgoing e-mail.
Normally you need a licensed user to be able to send e-mails using SMTP with Office 365. Your applications also need support for TLS encryption. If your application doesn’t support TLS, or if you need to send e-mails from another address than the licensed user’s address you need another solution. Luckily Office 365 can help you. The solution is to set up an inbound connector in Exchange Online Protection.
Setting up an Inbound Connector
An Inbound Connector is easily set up with just a few lines of PowerShell code. First we have to connect to Exchange Online.
$UserCredential = Get-Credential
$Session = New-PSSession -ConfigurationName Microsoft.Exchange `
    -ConnectionUri 'https://outlook.office365.com/powershell-liveid/' `
    -Credential $UserCredential -Authentication Basic -AllowRedirection
Import-PSSession $Session -CommandName 'New-InboundConnector'
Now we can create the Inbound Connector. All we have to specify is a Name for our connector, SenderIPAddresses which is the IP addresses to allow relaying from (your external IP address), and SenderDomains which is the domains to accept messages from.
You can also get your external IP address with PowerShell, here I will use a free IP detection tool from Dyn.
$ip = (Invoke-WebRequest -Uri http://checkip.dyndns.com).content `
    -replace '[^\d\.]'
New-InboundConnector `
    -Name 'SMTP Relay' `
    -SenderIPAddresses $ip `
    -SenderDomains '365lab.net'
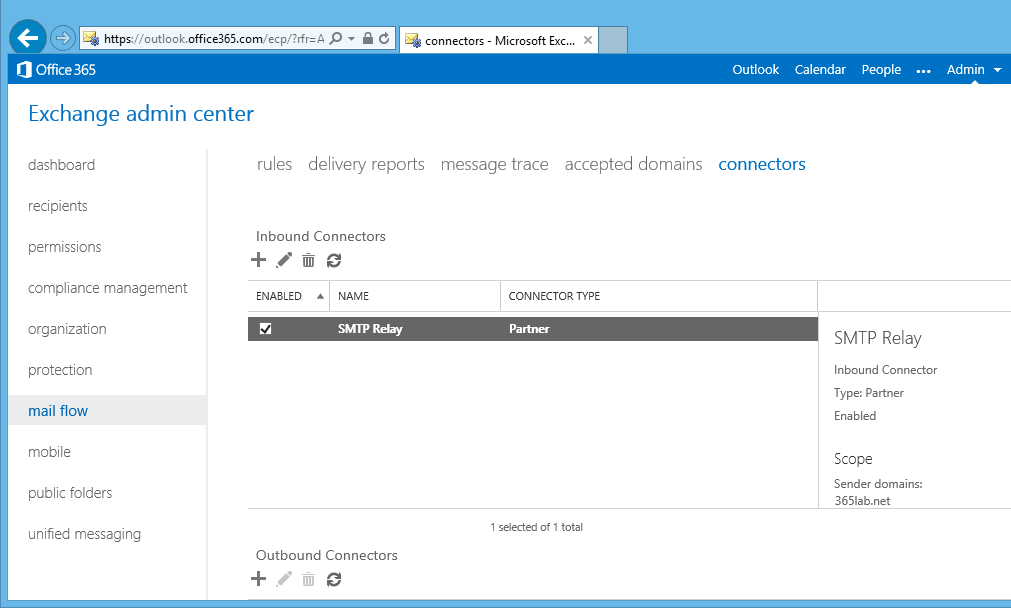
The settings for Mail Flow are also found in Exchange admin center, navigate to mail flow, and then go to the connectors section. Of course you can also use the GUI to create your connector.
When configuring your application to connect to this SMTP server, use your MX server name as SMTP server and connect using port 25. The server name can be found in Office 365 admin center, and looks something like domain-com.mail.protection.outlook.com.
Increasing security
With this method all computers on your network sharing the same external IP address can use your Inbound Connector. To strengthen the security I recommend only opening port 25 in the firewall from your devices that actually sends email. An even better alternative would be to set up an internal SMTP server that only accept connections from approved devices, and then uses your Inbound Connector as smart host. This can be achieved with the SMTP Service provided with Internet Information Services (IIS) in Windows Server.
Configuring IIS SMTP Service
First we have to install the SMTP Service in Windows. This can be done with PowerShell.
Note that the Add-WindowsFeature cmdlet in Windows Server 2012 is called Install-WindowsFeature, but Add-WindowsFeature still exists as alias for backward compatibility.
Import-Module ServerManager
Add-WindowsFeature SMTP-Server
This will also install the required dependencies for example the IIS 6 Management Console. When the installation is done we are ready to start configuring the service. Let’s set the service to start automatically when Windows starts:
Set-Service SMTPSVC -StartupType Automatic
The next step is to set Office 365 as Smart Host. Replace the Smart Host name with your own MX server.
$smtpsvc = [ADSI]'IIS://localhost/smtpsvc/1'
$smtpsvc.SmartHost = '365lab-net.mail.protection.outlook.com'
$smtpsvc.SetInfo()
We also have to set a Fully Qualified Domain Name to identify our SMTP Server.
$hostname = (Resolve-DnsName $ip).NameHost
$smtpsvc.FullyQualifiedDomainName = $hostname
$smtpsvc.SetInfo()
Finally we have to add our internal IP addresses that are allowed to use the SMTP Service. I prefer using the GUI for this. You will find these settings in the Internet Information Services (IIS) 6.0 Manager. Expand the local computer node, and right click on “SMTP Virtual Server #1” and choose Properties. On the Access tab click on Relay restrictions, and then add your local IP addresses that are allowed to use the SMTP Server. While in the GUI settings I also suggest having a look at the message size limits and logging settings.
Now we are all set. Don’t forget to configure your perimeter firewall to block outgoing SMTP traffic from all your computers except the SMTP Server.
/ Andreas
